Saturday, December 28, 2013

Phase 4: Master Closet & Vanity - Accessory Wall

Creative accessory organizers and displays are all over Pinterest lately.  That's where I got the inspiration for a lot of what I designed and created for my Accessory Wall.  


I started with Goodwill and found a lot of really cheap elements for my Wall.  This floral decoration caught my eye because of the large flowers that would go well with the Magnolia theme. ($2)


This large frame (which I apparently forgot to photograph the front of in its original state before painting it) had a foam board backing that wouldn't work for my project, so the husband bought and cut some plywood to fit. (roughly $10 total)


This toy shelf find was 99 cents and is from a Melissa & Doug toy!


I found a lot of great glassware, not all of which is pictured here, and some pieces will be used for my vanity to hold cotton balls, Q-tips, makeup brushes, etc.


Rather than buy a ton of new cabinet pulls, I used our stash of old cheap knobs and handles that we took out of the kitchen a few months ago.  They would need to be spray painted of course.


The most expensive part of making this wall was the spray paint.  Unfortunately, the lavender color looks like periwinkle blue after it's sprayed, so that was a waste of $7 ... but it worked out in the end.


 I got lucky with a nice, sunny weekend in August, and I covered the deck with cardboard for some serious spray painting!


Don't ask about the hammer ... that was for a Halloween costume ... ;o)


For the jewelry organizer, I spray-painted the old wooden frame from Goodwill in a metallic silver.  Then I lined up the old (and a few new) knobs and handles onto the plywood backing so that I could tell him where to drill holes in it.  The new knobs were 99 cents each at Lowe's ($5), and the handles were about $3 each, I think.  I chose to buy a few new ones because I was worried about certain jewelry being able to hang on the kind of old handles that I had.


After the holes were drilled, and after the lavender-that-looks-periwinkle-blue color disaster, I painted the plywood black.


Spray painting the knobs and handles was a bit of an experiment to see if the paint would even stick and look right.  Honestly, it didn't work 100%, but it was good enough.  The trick is to be patient and do one thin coat of paint at a time.  As this requires the "p" word ... PATIENCE ... my knobs didn't turn out so great.  But, they were good enough by my standards to go ahead and use!  (Sometimes I liked to use my mistakes in the finished work as a reminder that it's okay to make mistakes and be imperfect!)


After everything dried, we screwed the knobs and handles into the plywood, hooked it into the silver frame, and hung it on the empty purple wall on my side of the closet!


What I love most about it is seeing a re-furbished frame, knobs, and handles mixed with a new plywood backing, a few new knobs and handles, and a fresh coat of paint.


We had a few of these pre-shaped wooden boards left over from a Mother's Day project we worked on back in May, so I decided to spray paint both of them black and screw in some new coat hooks.  These hooks were probably about $3 each ... I tried to get the nicest, cheapest ones as always.


The plan for these hooks is to hang belts, scarves, hats, etc.  I have a long one with 5 hooks and a shorter one with 3 hooks.


These 2 wooden boards used to be wall decorations from the 1960s, I'm guessing, and I apparently forgot to take Before pictures of them, too.  They were 99 cents each at Goodwill, and I sprayed them black, then added a drawer handle to each.  The handles were the most expensive ones on the wall ... $4 each.  I wanted them to be sturdy.


The old wooden toy tray needed to be sanded well because of the paint and branding that was on it before.  Then I sprayed it with the same shiny silver paint.


I found this very ornate, textured, sparkly scrapbook paper (1 sheet .. less than $1).


I trimmed up the paper to fit each compartment.


Using spray glue (which I seem to really like because I use it in a lot of different projects!), I glued in the paper.


I would recommend more glue than less because the corners kept wanting to peel out, especially after this was mounted on the wall.  Maybe even use Mod Podge or some other strong glue where you can really control the application better than a spray adhesive.


I picked up these screw-in cup hooks at Meijer and used them to create little jewelry hooks inside each compartment.


The screws were a bit too long and poked out the other side, so I didn't screw them in all the way.  It looks okay.  Another option would have been to screw them in all the way and have my husband clip off the ends that poked through, but that would've left little holes in the outside of my jewelry box, so ... I didn't do that.


And here is the spray painted floral wall hanging.  It turned out really nice.


Here are a few other things that I picked up at various places like Goodwill, Michael's, and Jo-Ann ...


A pretty plate to line up some products on my vanity.


Some very Magnolia-looking flowers.


Some Magnolia-looking art ($1 each on clearance!).


I tried to create my own milk glass vase with spray paint and this cheap vase from Goodwill ... but as you can see from the drippage, I didn't do so well ... I'm planning to try that again in the future, but for now, I won't cover it in detail!


I did find another junky wooden frame and give it a fresh coat of black.  Then I just barely sprayed it with the shiny silver paint to make it look sparkly.


This frame still has a nice backing and the glass is intact, so I came up with a cute idea for how to include it in the decor... will reveal it later.


Here's another milk glass attempt ... it failed when I accidentally touched it with my finger.  Ugh.


I found this thick glass tumbler at Goodwill and threw some extra glass pebbles I had from another project into it.  Now my brushes live in it!

The Big Reveal is yet to come!  There is much more to do in the closet, and I don't want to give it all away.

Phase 3: Master Closet & Vanity - Building the Vanity

After we finished the shoe shelves, I really wanted to get the vanity built so that I could move all of my products and toiletries in there and get them organized.  


My plan was to use this $30 scrap of Formica counter top, trim it down to about 4 feet wide, and mount it to the wall ... somehow ... (insert husband here).  I had also been collecting those inexpensive, 3-cube white shelves so that I could stack them next to the counter top somehow ... (I'll be honest, I wasn't really sure how, but I knew we'd figure something out!)


And we did!  My husband got the counter top mounted ... which made me realize that the shelves I had were not deep enough and looked weird next to it (see below).  The shelves were 12" deep ... the counter top was 26" deep ... the baseboard and quarter round would extend from the wall by about 1" ... so at some point I thought, Why not stack 2 columns of shelves next to each other to fit the width of the counter?  I would leave the front column facing forward, but turn the back column sideways so that it is facing the counter, and then I can use them for super secret storage!


To do that, I had to buy a few more shelves (sorry, Budget...), but they are pretty cheap and were also on sale (justifying much?).  Luckily, I had plenty of fabric left over from the Shoe Shelf project to line all of them.


I wanted to line the back of the shelves for the same reason I wanted to line the shoe shelves.  It would add some character to an otherwise boring closet.  This was also my vanity area, and I spend at least an hour in there each day, so why not make it interesting to look at and enjoy?


It took a bit more effort to line the inside of these shelves than it did to wrap the shoe shelves because I had to make the edges clean and folded under, but they turned out really well.


There's the start of my "built-in" vanity!  Notice the tiny mirror that just isn't going to cut it, and the magnolia pictures that I found at Michael's ON CLEARANCE for a buck a piece!  I found a ton of other cute things to up-cycle on a lucky Saturday at Goodwill, which is the topic of my next post.


I found this mirror ON CLEARANCE at Home Goods for $22, and it's perfect for the space.  It has a very textured, metallic frame that I love.  (The tiny mirror will still be hung in the closet, just not as part of MY vanity.  Stay tuned...)


I'm currently looking for curtains/fabric to make curtains, and here are some of my favorites because they have large magnolia-looking flowers and are complementary colors:


I can't decide!  I'll probably wait and do the curtains last.  I also need to wait for a good sale/coupon.

The vanity area is not finished, so stay tuned!

Next up: The Accessory Wall.  This is the most fun project of my closet & vanity renovation so far because I got to actually DO many of the things I've seen and pinned on Pinterest this past year!  

Phase 2: Master Closet & Vanity - Shoe Shelves

After painting one side of the master closet and installing half of the flooring in Phase 1 of the Master Closet Renovation, it was time to slowly start getting our things put back into the closet.  Living out of laundry baskets, boxes, and the coat closet by our front door was not an ideal long-term situation.

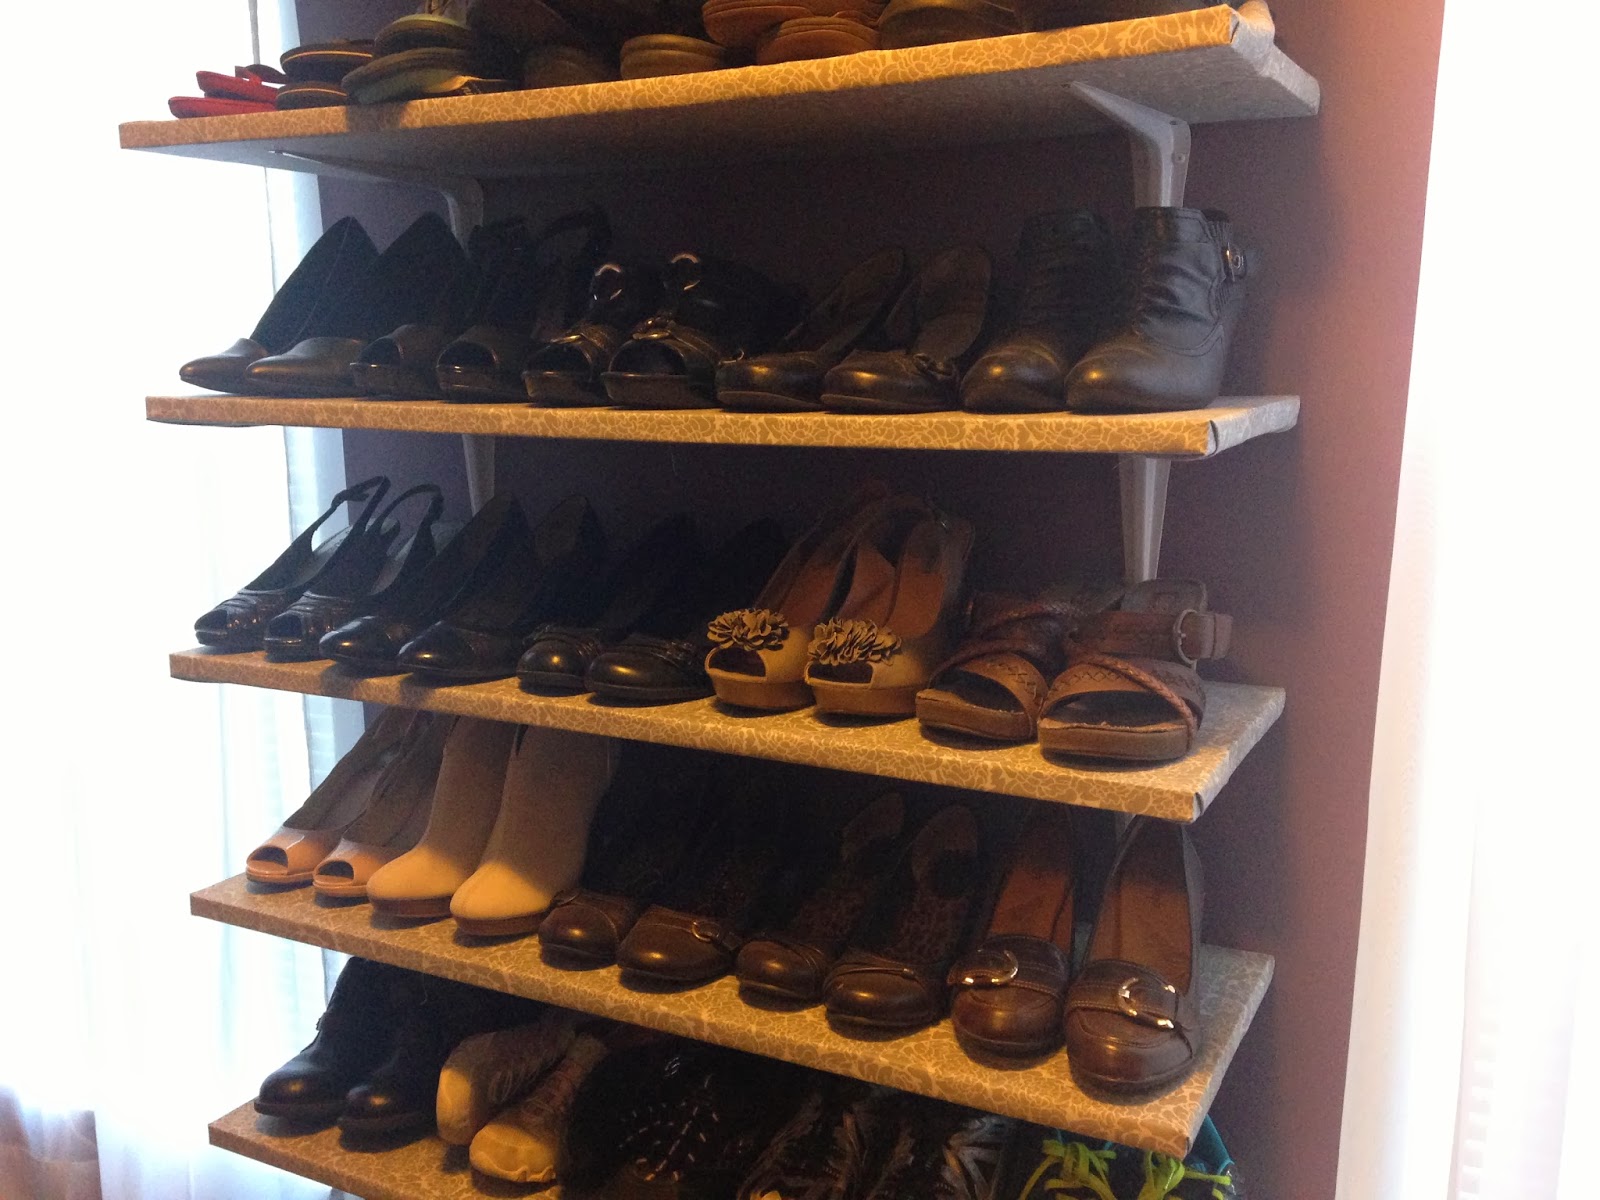
The next few projects were my shoe shelves, vanity shelving, and accessory wall.  In this post, I'll show you how we upcycled the plain white shelving that we tore down out of the closet and made fabric-lined, floating shoe shelves between the two windows.


I chose this fabric for the shelving because I was planning to accent the vanity area with metallics, but I also liked the magnolia-looking pattern.  I visited a friend over the summer and saw a magnolia tree for the first time in Memphis, TN.  I really love how beautiful they are, and I was seeing magnolias everywhere at Home Goods and craft stores, so I decided that they would be another element of the room.  


We had plenty of shelves to re-use, so I just needed to figure out how many shoes shelves I wanted, and then I could buy the right yardage of fabric and the right number of hanging brackets.  I measured my tallest shoes to figure out how much space to leave between each shelf.  I decided where I wanted the top and bottom shelves to sit on the wall.  The space in between the top and bottom shelves was then split evenly based on my ideal amount of space between each shelf. I ended up needing 8 - 36"x12"x1" shelves and bought 16 brackets to mount them with (2 brackets per shelf).  Yay, Math!


My plan was to wrap each shelf like a present and use spray adhesive to make the fabric stick to the shelf.  I had already lined a cabinet interior with fabric before (read about that project here), so I was pretty confident that they were going to turn out as I wanted.  (Note: some of the edges are coming loose now and fraying, so looking back, I would recommend tucking in raw edges and making sure to glue those down firmly).

I cut and ironed 8 pieces of fabric that were about 8" longer and wider than the shelf dimensions, to allow for wrapping around the edges.  I did not measure everything perfectly, so this part when very quickly.


Always glove up when you're working with spray adhesive!  It doesn't like to come off of your fingers!


I wrapped and glued each shelf like a present, tucking in the corners tightly.  This took about 10 minutes per shelf once I got the hang of it.  


When they were finished, it was my husband's turn to get them mounted onto the wall.


I am really happy with the decision to make these floating shelves because the lack of sides means that they don't block any of the natural light coming in from the windows.  I also think they add a lot of character to what would otherwise be just a boring closet.  


The top 3 shelves, which are at or above (my) eye level, had to be flipped over so that the fabric side is facing down and the glue side is facing up.  All of the other shelves below eye level are fabric side up and glue side down.


Ta-da!  Not bad considering what it used to look like .........


When this project was finished, and I had all of my shoes put onto the shelves, I couldn't help but think that these shelves deserve to hold shoes a LOT cuter than mine .... time to go shopping! :)


I clearly need to add some color to my shoe collection! Sheesh!  All browns, blacks, and tans for this girl apparently...


I hope to get a much better picture once the lighting and curtains are all finished.

Shoe shelf done!