Saturday, December 28, 2013

Sewing Room (a.k.a. My Room Away From the World)

I don't know many women who can say that they have a true "Sewing Room."  Many have to make do with what space they have.  That was me, too, in our first house.  I realize what a blessing it is that my home includes a spare room with big, bright windows and a spacious walk-in closet JUST for containing and enabling my hobbies.  (I am also grateful that my stepson agreed to take a room in the basement so that I could have said Sewing Room all to myself!)


So when I walk into my sewing room to find THIS ... I feel like I'm kinda slapping all of those women in the face, ya know?  Here I am with this blessing of space, and I'm just abusing it!  How DARE I?!


You see that brown table to the right?  My grandfather made that for my late grandmother.  You see the old, antique sewing machine table tucked underneath it against the wall?  It was my husband's great-grandmother's, and his grandfather made the wooden cover that protects the sewing machine.  I am EMBARRASSED that these family heirlooms are being kept this way.


So, with most of the other important areas of the house now painted, I can focus on my sewing room for a bit.  I at least want to get it painted and organized enough to do projects, like sewing curtains for my front room.


Like every other room in the house (except the basement, oddly enough), these walls have never been painted.  This is technically the third bedroom upstairs, just off the stairs.


My inspiration for this room is yellow.  My grandmother loved yellow (my mother's mother, not my father's mother mentioned above).  There are some very nice patterns on the market right now, including these found at Jo-Ann and Meijer:


I didn't buy any of these, but I should probably check to see if there are any left before they go out of stock!  I just wasn't ready to purchase when these photos were taken.


I decided to start with the closet because that would allow me to get more stuff OUT of the room and INTO the closet.  The closet has 3 wire shelves (that you know I love!) and was so piled up with stuff at one point that I couldn't even walk into it!


So, having watched my husband rip out plenty of other wire shelves in the past year, I ripped out the shelf on this wall only, patched up the holes and sanded them, then began to paint the closet a nice light gray color.


It took about 3 hours total on a Monday night after work to get about 75% of the closet painted, including baseboards.  I came back a few weeks later to paint one side of the closet door.


The plan is to get one side of the closet built out and organized so that I can free up space in the room and on the other side of the closet piece by piece, without having to pull things out of the room.  Ideally, I can just shut the door to this room and walk away from it for days/weeks if I have to.


I forgot to sand some of the holes I patched, so I couldn't paint them.  And since the paint was wet, I couldn't sand them until it dried.  Oops.


Nice neutral gray.


Once it dried, I bought and built a cheap white shelf and started putting things onto it and stacking my organizers next to it.  The space is about TWO inches to narrow for a second white shelf!  So irritating.  The husband wanted to do built-in shelving, but we agreed that it would take too long and cost more for just a sewing closet.  Maybe someday we'll come back through and make it the full built-in it could be!


With one side done, I could rip out the shelves on the other side and patch up those holes.


I'm just a few steps closer to a functional sewing room that I can walk around in and actually sew in!

I think we'll add a chair rail to this room as we did in the other bedrooms, which will cost a little bit more, but not too bad.  The end result is worth it.  I should be able to get the painting done while I'm on vacation.

Front Room & Entryway

I took FOREVER to choose colors for our entryway and front room.  I bought a variety of samples ... purples, red-ish purples, browns, pukey greens, grays ....


When people came over, I'm sure it looked a little crazy with all of the paint smudges everywhere!


And then once you got past the indecisive paint swatch area, you were presented with a stairway that looked like this:


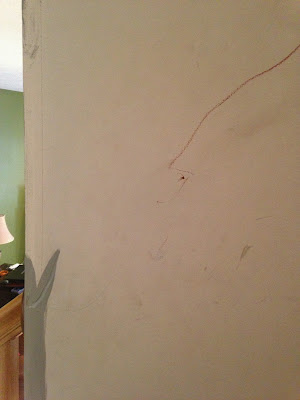
I was afraid to touch it myself for fear of catching something.  There were scratches, crayon markings (that I'm almost positive were NOT my kids' artwork, but I could be wrong), gouges from someone probably moving furniture.


I'll spare you a photo of the stairway carpet.  It was bad. BAD.  Like, don't let your baby/toddler crawl on that nasty carpet BAD.


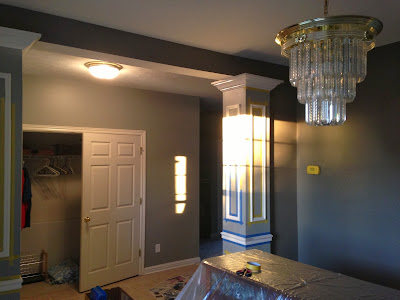
And the front room, complete with lovely "chandelier" was about as inviting as ... well, this. You can see it.  Plain just like the rest of the house when we bought it.


I had seen this picture on Pinterest.  I would add a credit, but I can't remember where it's from (sorry).  I thought, "We have pillars like that!"  I wanted to re-create this so badly, but every purple-y brown color that I picked to match just doesn't look right to me.  Not in our space.


So we went with this gray.  It blends well with the green color right next door in the living room, and we took it all the way up the stairs to the playroom, where it looks fine with that bright blue as well.  


Plus, it looked great in a paint sample we got from Lowe's that included this nice brown earth tone we chose for the front room.


Here was my inspiration for the front room:


We have a really nice wine cabinet in the front room that is dark cherry with green ivy vines on it.  I want to keep it in there and keep a earthy vibe in the room.  Since I couldn't decide on a purple for the walls, I decided to keep the purple as an accent color instead.  The gray from the entryway is in this decoration, the brown of the front room walls, the green of our wine cabinet, and the purple will come in with the curtains and other furnishings.


We eventually want to replace all of the carpets on the main floor with dark hard wood flooring, so every decision we make about paint and decor is with that future goal in mind.  I wonder when we'll ever have the money to do that, unless we go one room at a time, but hey ... 


We found a nice new light fixture to replace the gold and plastic one (finally!).  It was less than $100 on sale, and it matches the curtain rods I chose.


I put up some $5 white sheer curtains just before the holidays, and I plan to sew custom rod pocket panels to go around and over top of them soon.  


Oh, and FYI, painting the pillars was a CHORE.  Not fun.  At all.  Seriously.  Sucked.  And took forever.  But whatever ... they look nice.


There's not much else going on in this front room right now because of other priorities.  I need to be able to walk into my sewing room before I can sew the curtains.  We are stalking Goodwill and other thrift stores for furnishings that we can re-furbish or that are already perfect for this space, but until then, it just has a facelift from the filthy off-white barren-ness to this more elegant color and mood.


Adding to the sheer amount of work that this house is for us (read: ME, because I'm the resident painter!), every interior door has to be painted white to match the baseboards and to otherwise look clean.


In the above picture, the door on the left has not been painted white, but the white one just got a first coat.

In the picture below, the door on the left has been painted two coats of white, but the one on the right, my bedroom door, is still as it was.  And it's probably the filthiest door I've seen in this entire house, so I'm really glad it's painted now, even if it will be a few months before my bedroom itself sees a coat of paint!


And that is all we have done to the front room and entry way for now!


Playroom Facelift

One of the largest open spaces in the house is at the top of our stairs, and we are using it as a playroom for the kids, since it's right outside their bedrooms.


(Ignore the random doors ... I took this picture while working on the kids' bedrooms about a year ago.)
We managed to get it organized at some point, but it still didn't really capture the kids' inspiration.  It's like pulling teeth to get them to play in there!


There is a lot of potential in this room for different sections of fun & relaxation.  I'm thinking a comfortable reading area, a big table in the middle with chairs so that they can color, work puzzles, and build Legos, and of course plenty of storage cubbies, which we already have.


I needed to pick colors that would be gender neutral and also go with whatever color I chose for the stairway.  The stairway continues down to the first floor where we needed to also coordinate with the color palette.


This giant wall is just asking for a mural! But, since that's outside of my creative skill-set, we're thinking about a big flat screen TV someday when the kids are older.  For now, we have plenty of places to watch TV and play video games, so we'll keep the playroom a creative imagination space.


I found a nice, rich blue color that I like and decided to add some character by painting cream stripes on both long, mostly empty walls.


I trimmed what I could of the blue, and we had an idea of where the stripes would be, so we rolled the cream section without much attention to lines.  The plan was to tape the stripes over the dried cream color and cover up any cream overflow with blue.


When you're painting late at night and really tired, you try to make it as fun as you can ...


Once the cream was dry and the stripes where chalked and then taped, I finished the blue trim.


I wanted a thick cream stripe and then a smaller cream stripe.


When the blue trim was dry, I taped around the baseboards and brightened them up with white.  You can see the filth Before on the left, and the bright white After on the right.


The half wall separating the stairs from the playroom was really filthy, too.


This shows you the filthy top of the half wall, and the molding underneath it that I painted first.  Such a difference in what you "think" is white and then what is REALLY white!


And here is the finished paint job:


This doorway leads to the kids' rooms and bathroom, which we also painted the same blue to be thrifty and use all of our paint.


I was busy painting something else, so I couldn't trim first.  I always prefer to trim before the husband comes through with the roller!  I think it looks nicer to trim first, then roll out any brush marks.  Plus, if I trim a good 2-3" off the ceiling or other wall, then he doesn't risk getting to close to it with the roller.  (I love him, but he hates painting and is a sloppy roller!)


We already had these 2 shelves, and we decided to balance the room by adding 2 shelves to the opposite corner as well.


And in the middle, a comfortable reading area with our old rug that still matches, a couple of blow-up chairs that were on clearance at Meijer for $7 each, a few $5 cream curtains from Meijer, balanced by a few slightly more expensive cream, sheer, flower-embroidered curtains from Bed Batch & Beyond for texture.


The random armoire belongs to our nursery set but is currently holding all of the dress-up clothes, so it stays for now.


The room is much more playful and inspiring for the kids now, but the one ceiling fan is not enough light for this big space.  We plan to install recessed lighting with dimmer switches around the room so that it's not so shadow-y.


The round-ish table in the center was a Goodwill find and a temporary fix for the lack of table.  We want to find OR make a big table for the kids that they can color and build stuff on.  I would prefer to make it because I have some specific ideas in mind that may become a future post ................


The stairway ended up being a gray color that we actually carried into our entryway downstairs and into the tiny hallway that leads to our master suite.  I think it does just fine with the blue and cream.


To use up all of the cream and to make sure the room wasn't TOO blue, we painted the half wall the same cream as the stripes.  This also allowed us to keep the various tote colors in our square cubbies without too much clash.

Before:


After: 


Not bad, eh?
As always, still more to do, but we have already noticed that the kids like to actually play in their playroom now, so that's good.