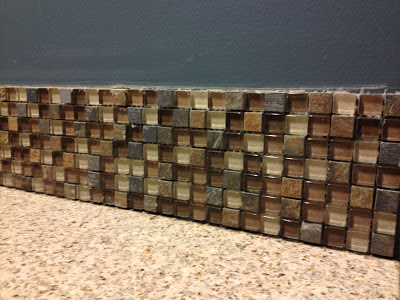
 Supplies:
2 - 12x12 glass and stone tile sheets. We measured and determined that our backsplash should be 7 squares high and flush with the counter top on each side. With the right cuts, we could make 2 sheets work and use almost every tile.
This page on Lowe's web site does a good job listing out what tools we had to buy. We can use all of them, including the leftover mortar and grout, on future projects.
(In fact, their web site will probably tell you how to do this better than mine will :o) and that's ok.)
Prep:
Get the mortar ready, and follow the instructions on the package to mix it, using a bucket and a cool mixer tool that attaches to a power drill!
 Cover everything that you do Not want to get mortar on, and cut the tile pieces. We had 4 - 7x12 chunks, then had to use 1 - 3x12 and 1 - 4x12 to make a fifth 7x12 chunk. On one edge, we were also going to need to piece together some of the extra tiles to make it our desired length.
Mark the wall with a pencil where the top of your tile will be. This will help you when spreading the mortar so that you don't make it too tall (and have to wipe off a bunch of excess) or to short (and need to add more).
 When the mortar is ready, spread it onto the wall with a trowel, following your penciled lines as a guide. You want the mortar to be evenly spread, and you want to finish it off with the toothy side of the trowel so that there are lines in it, like so:
On this short side, we needed 2 - 7x12 chunks only, so starting in the corner where both walls meet, we started sticking one chunk of tile, pressing down each row into the mortar.
Use tile spacers (the little white things in this picture) between the bottom row and the counter top because you do Not want the tile to be touching the counter top. There needs to be a gap so that you can caulk it later and seal the opening between tile and counter top.
Tile spacers:
 We continued on to the next side, which took 3 - 7x12 chunks and a little extra on the very edge, which we pieced together with the scrap tiles.
 When piecing together the scrap tiles that aren't connected anymore by the mesh backing that they come on, make sure you use the spacers.
Once the tile is all stuck into the mortar, go around and flatten it all with your rubber grout float. Then clean up the excess mortar around the edges.
It should look like this:
Now, I wish I could show you how my husband did the grout a few days later, but he didn't take a single picture of this process! So ... all I have is the end result, which will be shown in the Big Reveal of our Guest Bathroom project.


No comments:
Post a Comment