Sunday, November 4, 2012

New & Improved Pantry Project

When most people who toured our new house saw the pantry, they would comment on the abundance of shelving.

When I would walk into my pantry, I would cringe and sometimes even curse.  Shelving is great ... when you can get to it!  Shelving is wonderful ... when things don't keep falling over or through the wires.  I LOVE Shelving ... when it's installed correctly and makes efficient use of the the space available.  (I don't care how small your pantry space is, you CAN and SHOULD make efficient use of every inch, both vertical and horizontal!)

Here is what the pantry looked like before:


My issues with this space:

  1. Wire shelves.  I hate them.  If I can afford to replace them, I do ... or I save up until I can.  And then I do.
  2. The room is 108" tall, but the tallest shelf is 2.5 feet from the ceiling.  Waste of space.
  3. Wire shelves are not adjustable and cannot be customized to fit your needs.  
  4. The strange corner section made the entire corner unusable.  The only things you could put back there were things you didn't get out very often.  It was a pain to maneuver them in and out.
  5. It's only a pantry, and it's right inside the garage, which is where our family usually enters the house.  I have 3x the pantry I need and ZERO Mudroom / Drop Zone space.
  6. Linoleum.  I could handle it if it were clean ... but it is far from clean.  (Which is a theme throughout our entire house ... hence the theme of this blog!)
  7. I didn't take a picture of this, but there are TWO doors that swing into this alleyway; one opens in from the garage, and the other opens in from the kitchen.  Is there enough space to open both at the same time without them touching?  No.  If you're inside the pantry, and both doors are open, are you trapped?  Yes.
  8. Obviously, the lack of color, style and personality.

On the other end of this pantry is the laundry space, shown below both With and Without our current washer and dryer.  (I am dreaming of a day when they break and I have a reasonable need to replace them with newer, energy-efficient ones that are both front-load.  I think our fridge will die before the washer and dryer though.  One of these days .........)


So, I have a pantry, a laundry area (though lacking in places to hang clothes at the moment), and still no Mudroom area.  What was a girl to do?!

Take Action!


Bye, stupid shelves!


Okay, we actually tore out the left side and back wall shelving over a month ago, but the right side was just torn out yesterday.  My husband patched up a million holes left by the shelving, sanded everything until smooth, and then we wiped down the dust.  He also tore out the baseboards:


Yuck!  So dirty!


We finally chose a color palette for the pantry.  This, and the Guest Bathroom project, are the only reasons that I didn't start renovating the room much sooner.  (You just have to wait for the right inspiration sometimes!)  With the palette chosen, and the paint purchased late Friday night, we got to work early on Saturday:


The wall color is called "Hot Stone" and (to me, but no one else) looks like Hot Chocolate.  It's not grey or brown, but a blend of both.  I wanted to choose a color that would not clash with the eventual kitchen remodel, since the pantry is visible from the kitchen.   In these pictures, it looks more grey than brown ... but later, with the new flooring, it really looks more like hot chocolate.  This is while the paint dried and while the baseboards were being painted white in the basement:


Adding to the excitement of our Pantry renovation was my husband's discovery of dirt cheap, extremely high quality real-wood flooring (not laminate) in a color that we love!  We had come very close to putting down a very cheap laminate in the pantry, or perhaps putting down real hard wood ($$) as an experiment to see if that's what we wanted in the entire kitchen eventually ... but then this discovery was too good to pass up and made it really easy to make up our minds.  We got this real, pressed wood flooring for less than laminate would have cost!  Lucky find and good decision?  Yeah, we think so, too.

My husband determined that the linoleum was glued to the wood floor underneath, so he could not rip it up as he had planned.  Instead, the new floor would have to be installed on top.  Starting with the padding:


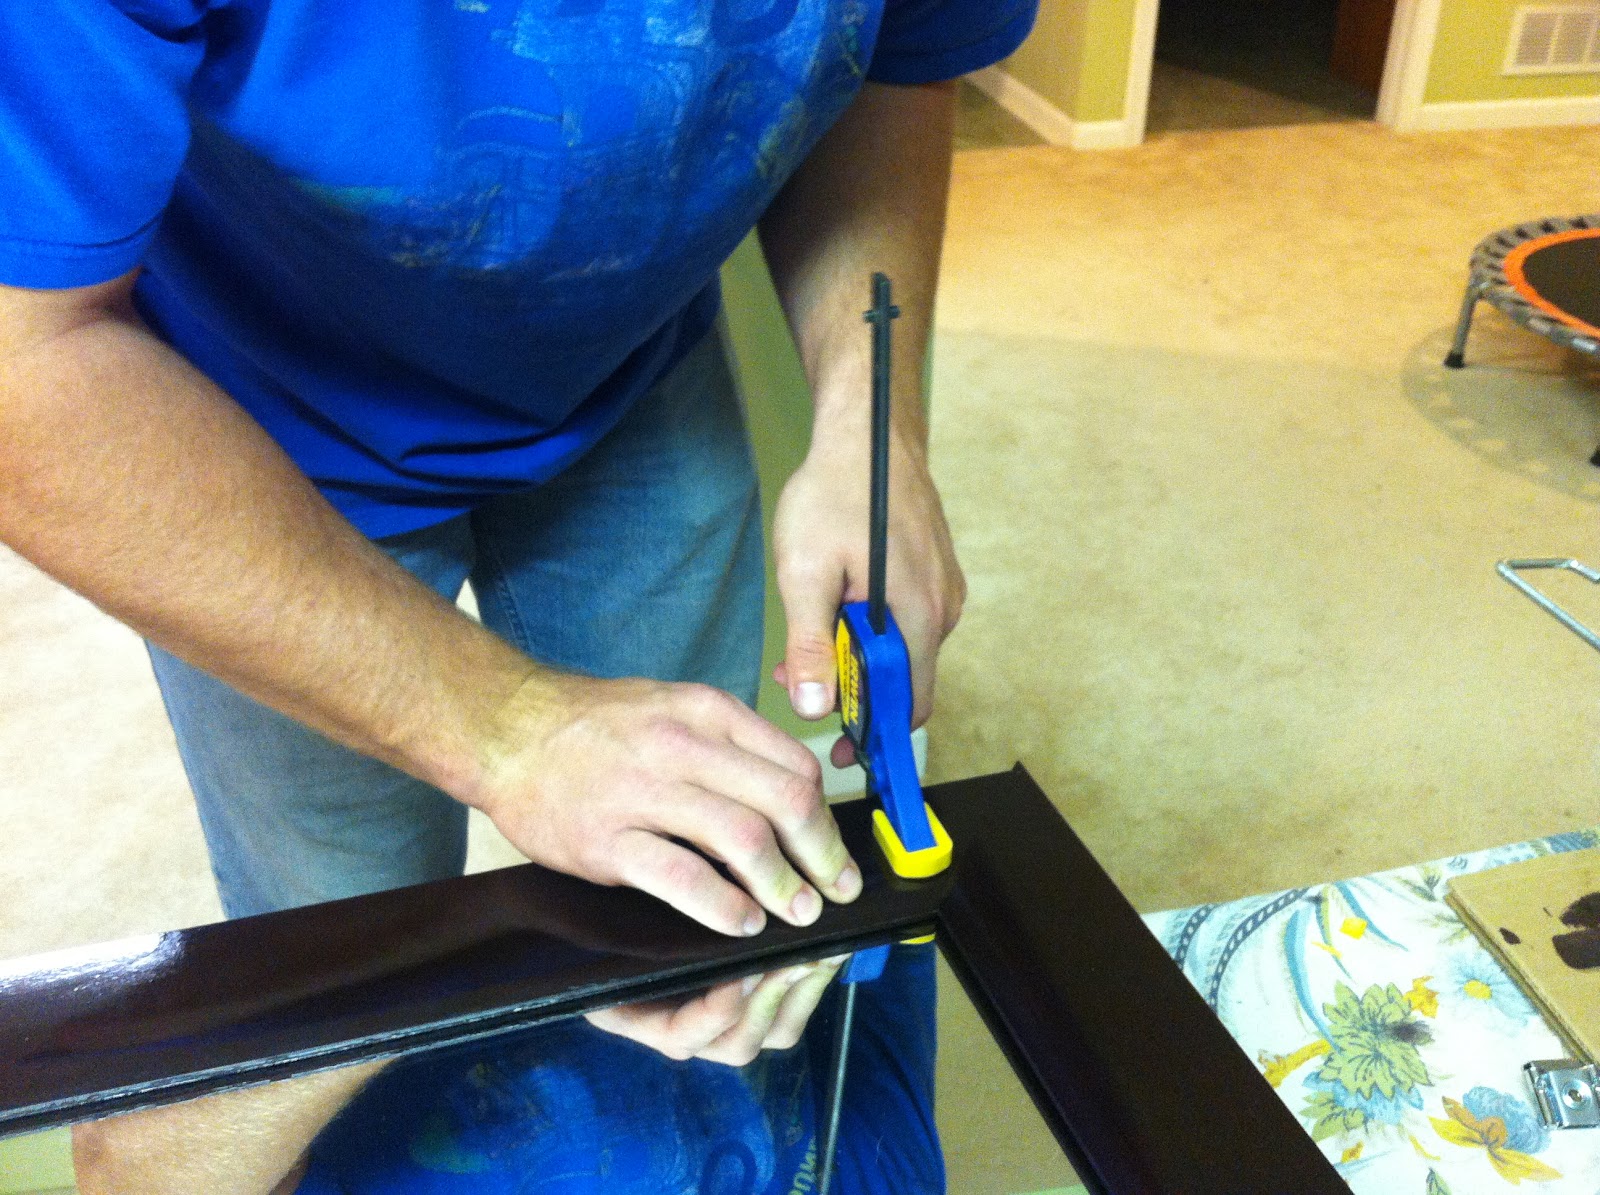
Then starting with the straightest, easiest wall to begin installation:


Tools:
(A saw became necessary too, to cut boards.)


A few hours later ... TA DA!  (See?!  Hot chocolate!)


Baseboards re-installed, flooring installed, and walls dry ... just need to install the crown molding once we pick out the right style. 


Close-up of the flooring:


Ooooohhhh..... 


So, I started off this post by complaining about a long list of defects in this room, so let me explain what my vision is for the New & Improved Pantry/Mudroom/Laundry space.  

The Laundry space is not expected to change much until after the holidays.  It is less critical compared to the lack of Mudroom.  At some point, there will be better shelving for baskets and laundry supplies, plus a hanging bar.

The 'end cap' (below) as I'm calling it will be where the food goes.  We bought 4 lengths of wood for almost floor-to-ceiling shelving, which will hold all of our food, household items and some seldom-used appliances.  The bottom 3 feet of space will be where the dog food and water live.  If we make use of the entire 48" x 20" x 108" space, this will be plenty of storage for the things that do not belong in our kitchen cabinets.


To the right of this end cap, we will be building a custom Mudroom.  I've seen a lot of ideas online, and I've downloaded a few plans, but I think we'll take all of those ideas and design our own version to meet our family's needs.  I have the paint for this Mudroom and the Pantry section already chosen, and I'll show the construction of this space in a later post.

And so the New & Improved Pantry Project begins!  Stay tuned.


Big Reveal: Guest Bathroom


It's time to unveil the Guest Bathroom!  It took 2 months of "an hour here, an hour there" to get it finished, but finish it we [finally] did!  Just in time for the holidays, too.

Let's do a side-by-side comparison on everything that was replaced/renovated in this bathroom, shall we?

The Faucet:


The Counter Top and Sink:


The TP Holder:


The Cabinet Exterior (See Original Post):


The Cabinet Interior (See Original Post):


The Door Knob (yes, we're thorough :o):
I even took the door down, primed and painted it to match the bright white base boards and crown molding.


The Light Fixture:


And now, for the Big Reveal .....


I'm so proud of the way our Guest Bathroom turned out.  I will not be embarrassed to have people over for the holidays or otherwise.  I am still keeping my eyes open for the perfect decorative accents to add to the room, but I'm in less of a hurry to do that.  The right thing will pop out at me one day, and I'll add it to the space.  Until then ... ON TO THE PANTRY / MUDROOM!


Backsplash

Neither of us have ever installed a tile backsplash before, but it is actually pretty simple.  Just take your time, plan all of the steps in advance (including drying/setting time ... don't think you're going to get this all done in one evening!), and be careful not to get mortar everywhere...

Supplies:
2 - 12x12 glass and stone tile sheets.  We measured and determined that our backsplash should be 7 squares high and flush with the counter top on each side.  With the right cuts, we could make 2 sheets work and use almost every tile.


This page on Lowe's web site does a good job listing out what tools we had to buy.  We can use all of them, including the leftover mortar and grout, on future projects.

(In fact, their web site will probably tell you how to do this better than mine will :o) and that's ok.)


Prep:
Get the mortar ready, and follow the instructions on the package to mix it, using a bucket and a cool mixer tool that attaches to a power drill!


Cover everything that you do Not want to get mortar on, and cut the tile pieces.  We had 4 - 7x12 chunks, then had to use 1 - 3x12 and 1 - 4x12 to make a fifth 7x12 chunk.  On one edge, we were also going to need to piece together some of the extra tiles to make it our desired length.

Mark the wall with a pencil where the top of your tile will be.  This will help you when spreading the mortar so that you don't make it too tall (and have to wipe off a bunch of excess) or to short (and need to add more).


When the mortar is ready, spread it onto the wall with a trowel, following your penciled lines as a guide.  You want the mortar to be evenly spread, and you want to finish it off with the toothy side of the trowel so that there are lines in it, like so:


On this short side, we needed 2 - 7x12 chunks only, so starting in the corner where both walls meet, we started sticking one chunk of tile, pressing down each row into the mortar.

Use tile spacers (the little white things in this picture) between the bottom row and the counter top because you do Not want the tile to be touching the counter top.  There needs to be a gap so that you can caulk it later and seal the opening between tile and counter top.


Tile spacers:


We continued on to the next side, which took 3 - 7x12 chunks and a little extra on the very edge, which we pieced together with the scrap tiles.

When piecing together the scrap tiles that aren't connected anymore by the mesh backing that they come on, make sure you use the spacers.


Once the tile is all stuck into the mortar, go around and flatten it all with your rubber grout float.  Then clean up the excess mortar around the edges.


It should look like this:


Now, I wish I could show you how my husband did the grout a few days later, but he didn't take a single picture of this process!  So ... all I have is the end result, which will be shown in the Big Reveal of our Guest Bathroom project.


Custom Mirror Frame

Adding a custom frame to those big giant mirrors that builders install into new homes is a very popular trend right now.  You can find tutorials online by doing a simple Google search, and each person will give you different tips and tricks.  We combined everything that I learned into a plan for our guest bathroom mirror frame, and in this post I will walk you through the steps to our approach.

We started here, with the big mirror in our guest bathroom (complete with it's own set of soap and lotion dispensers...):


It is held to the wall with metal brackets, not the plastic ones that I see a lot of DIY-ers blog about.  You'll see a picture of them later, and I'll explain how my husband cut notches into the wood frame pieces so that we could still use the same brackets that were holding the mirror to the wall before.  (Money savings!)

Supplies:
I recently blogged about our cabinet makeover project from oak to black cherry.  We used the same black cherry stain and polyurethane spray left over from that project to stain and protect the wood that my husband bought and cut for this mirror frame.  One strip of wood baseboard purchased for about $12 was all the wood we needed to cut four lengths for the 36" x 30" mirror frame.  My husband used his table saw and other mysterious "Man Tools" to cut 45-degree angles on each end of the four wooden pieces so that they fit together at each corner.  (He did not take pictures of this step, but the four pieces are shown below.)  We also purchased Liquid Nails as our chosen method of adhering the wooden frame to the mirror before mounting the mirror back to the wall with its original metal brackets.  This product runs about $6, and there is probably enough to frame every huge mirror in our house - very cost-effective.  You will also need a caulking gun for the Liquid Nails and clamps for the gluing and framing step.


After my husband cut the wood strip into four pieces based on the measurements of our mirror, I lightly sanded off any imperfections on the wood (fine grit), and then I stained the top and sides of each piece with a sponge brush twice over the course of 2 hours (allowing for drying time of each coat).  

An important tip that I learned on another DIY-er's blog is that you should stain/paint the back side of each piece on the edge that will potentially be reflected in the mirror once your project is done.  (I will call this out in one of the pictures below.)


My husband finished off my staining job with polyurethane to protect the finished product, and then it was his turn to piece the frame together and glue it to the mirror with Liquid Nails.

With the mirror lying flat, facing up, he laid each wood piece onto the mirror and matched up the corners in advance of any gluing.  Then he used clamps to secure each corner, locking the shape in place to prevent one side from slipping and screwing up the whole thing.  

One at a time, he un-clamped a side, turned over the wood piece and applied Liquid Nails to the same inside edge that we stained for potential reflection in the mirror.  This is the edge that will be glued to the mirror obviously, but if the wood separates from the mirror even slightly after installation, the reflection will now show a black cherry color, not the wood's original color.


With Liquid Nails applied, he then took the piece back to the mirror and fit it right back into its original spot, lining up the corners again with their adjacent wood pieces, and then clamped the glued piece down again to set it.

Rinse and repeat 3 more times!


On the last piece, everything was lined up perfectly, but for some reason, that piece wanted to bow up in the middle rather than stick nicely to the mirror.  So he got a fifth clamp and forced that booger down!


After all four pieces are glued to the mirror, let it dry according to the instructions on the Liquid Nails packaging.  

Here is a look at the way my husband notched the back of the wood pieces to allow the metal brackets to still do their job and fit around the mirror's edge, but with some breathing room so that the frame can lie flat against the front of the mirror. When the mirror is hung back on the wall, this will help the mirror and its new frame lie flat against the wall rather than creating any awkward gaps or bumps.  Nice and snug! (Ain't he smart?)


Once the mirror frame is glued to the mirror and brackets re-installed for hanging, hang it back up!


We are getting closer to the Big Reveal!