I don't know many women who can say that they have a true "Sewing Room." Many have to make do with what space they have. That was me, too, in our first house. I realize what a blessing it is that my home includes a spare room with big, bright windows and a spacious walk-in closet JUST for containing and enabling my hobbies. (I am also grateful that my stepson agreed to take a room in the basement so that I could have said Sewing Room all to myself!)
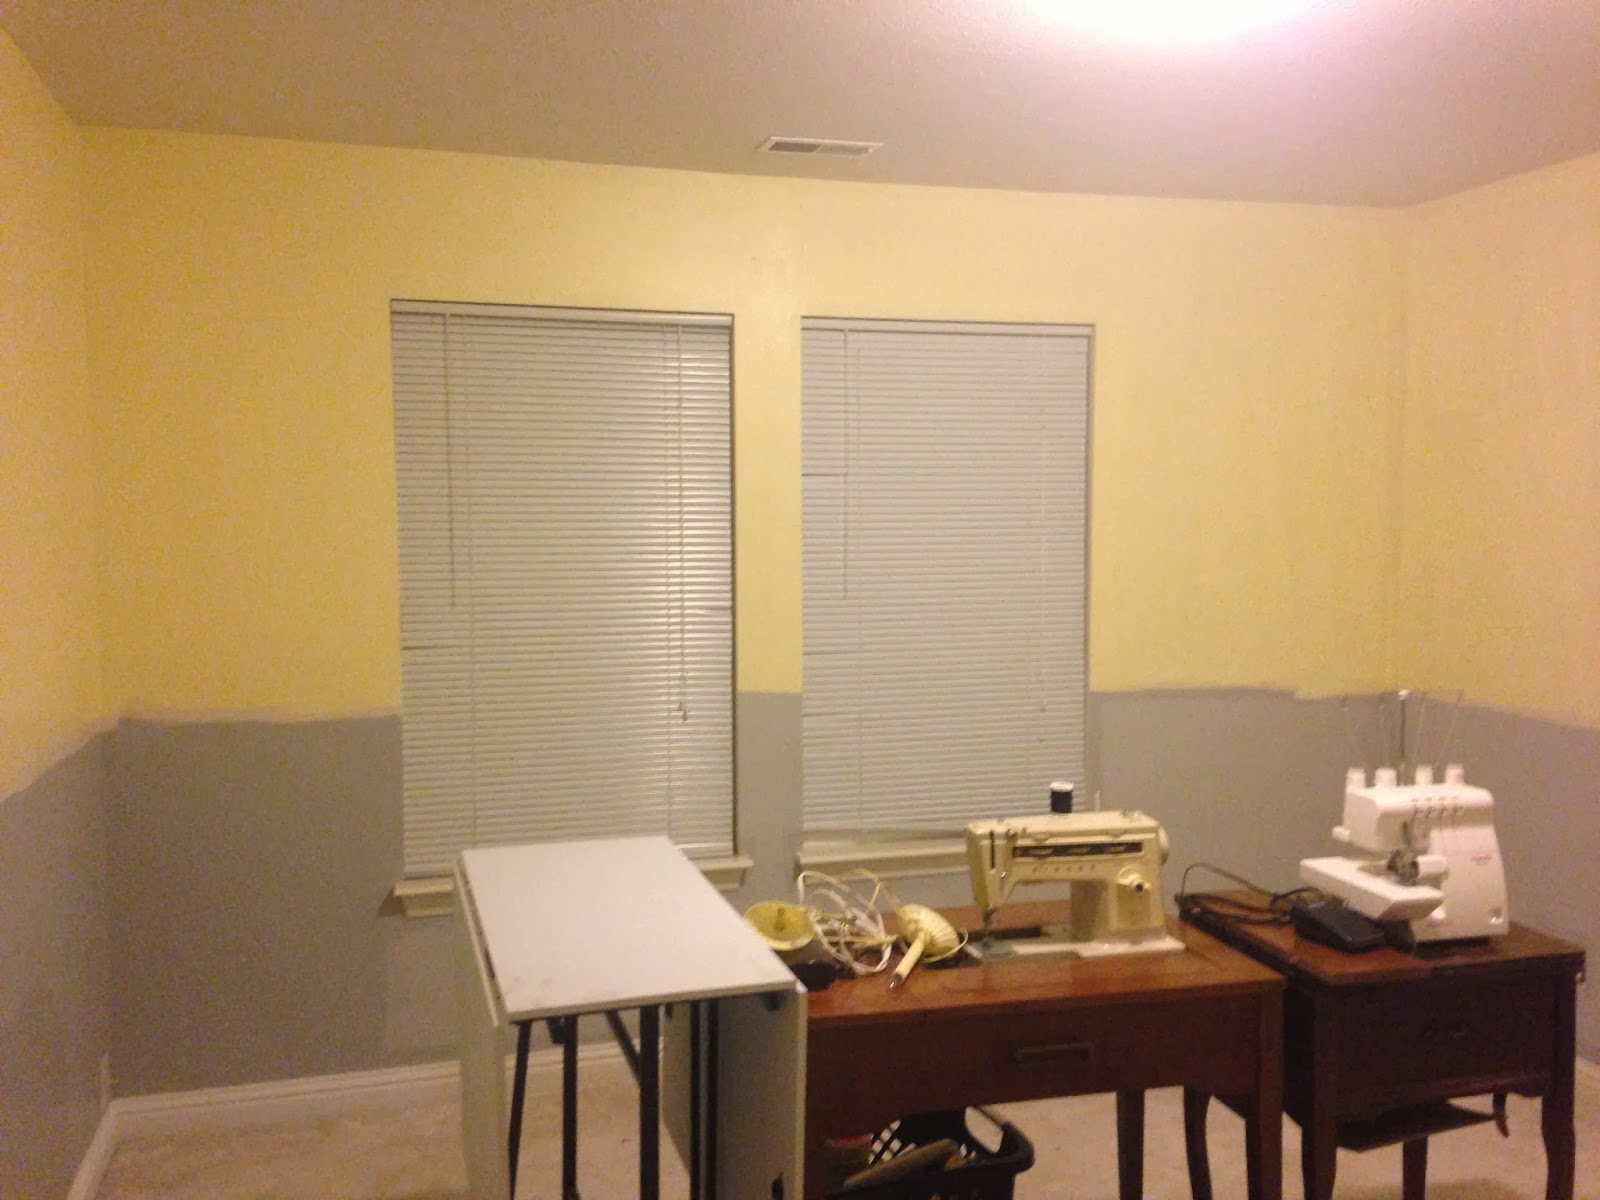
So when I walk into my sewing room to find THIS ... I feel like I'm kinda slapping all of those women in the face, ya know? Here I am with this blessing of space, and I'm just abusing it! How DARE I?!
You see that brown table to the right? My grandfather made that for my late grandmother. You see the old, antique sewing machine table tucked underneath it against the wall? It was my husband's great-grandmother's, and his grandfather made the wooden cover that protects the sewing machine. I am EMBARRASSED that these family heirlooms are being kept this way.
So, with most of the other important areas of the house now painted, I can focus on my sewing room for a bit. I at least want to get it painted and organized enough to do projects, like
sewing curtains for my front room.
Like every other room in the house (except the basement, oddly enough), these walls have never been painted. This is technically the third bedroom upstairs, just off the stairs.
My inspiration for this room is yellow. My grandmother loved yellow (my mother's mother, not my father's mother mentioned above). There are some very nice patterns on the market right now, including these found at Jo-Ann and Meijer:
I didn't buy any of these, but I should probably check to see if there are any left before they go out of stock! I just wasn't ready to purchase when these photos were taken.
I decided to start with the closet because that would allow me to get more stuff OUT of the room and INTO the closet. The closet has 3 wire shelves (that you know I love!) and was so piled up with stuff at one point that I couldn't even walk into it!
So, having watched my husband rip out plenty of other wire shelves in the past year, I ripped out the shelf on this wall only, patched up the holes and sanded them, then began to paint the closet a nice light gray color.
It took about 3 hours total on a Monday night after work to get about 75% of the closet painted, including baseboards. I came back a few weeks later to paint one side of the closet door.
The plan is to get one side of the closet built out and organized so that I can free up space in the room and on the other side of the closet piece by piece, without having to pull things out of the room. Ideally, I can just shut the door to this room and walk away from it for days/weeks if I have to.
I forgot to sand some of the holes I patched, so I couldn't paint them. And since the paint was wet, I couldn't sand them until it dried. Oops.
Nice neutral gray.
Once it dried, I bought and built a cheap white shelf and started putting things onto it and stacking my organizers next to it. The space is about TWO inches to narrow for a second white shelf! So irritating. The husband wanted to do built-in shelving, but we agreed that it would take too long and cost more for just a sewing closet. Maybe someday we'll come back through and make it the full built-in it could be!
With one side done, I could rip out the shelves on the other side and patch up those holes.
I'm just a few steps closer to a functional sewing room that I can walk around in and actually sew in!
I think we'll add a chair rail to this room as we did in the other bedrooms, which will cost a little bit more, but not too bad. The end result is worth it. I should be able to get the painting done while I'm on vacation.