The kids' bathroom is barely used. Since we moved in, the kids don't like to be upstairs without us. That includes bath time.

The bathroom fixtures are all standard builder grade.

We already had the ocean-themed shower curtain and some towels that we wanted to keep and use for inspiration. With both girls and boys using this bathroom, we didn't want anything too gender-specific. I also wanted to choose a theme that would grow with the kids instead of requiring me to update it in a few years. I also like the really bright colors that I can't get away with putting anywhere else in the house except a kid bathroom...

The walls and linoleum are all pretty scuffy and yuck.

The counter top is broken on one side and unattached from the wall.
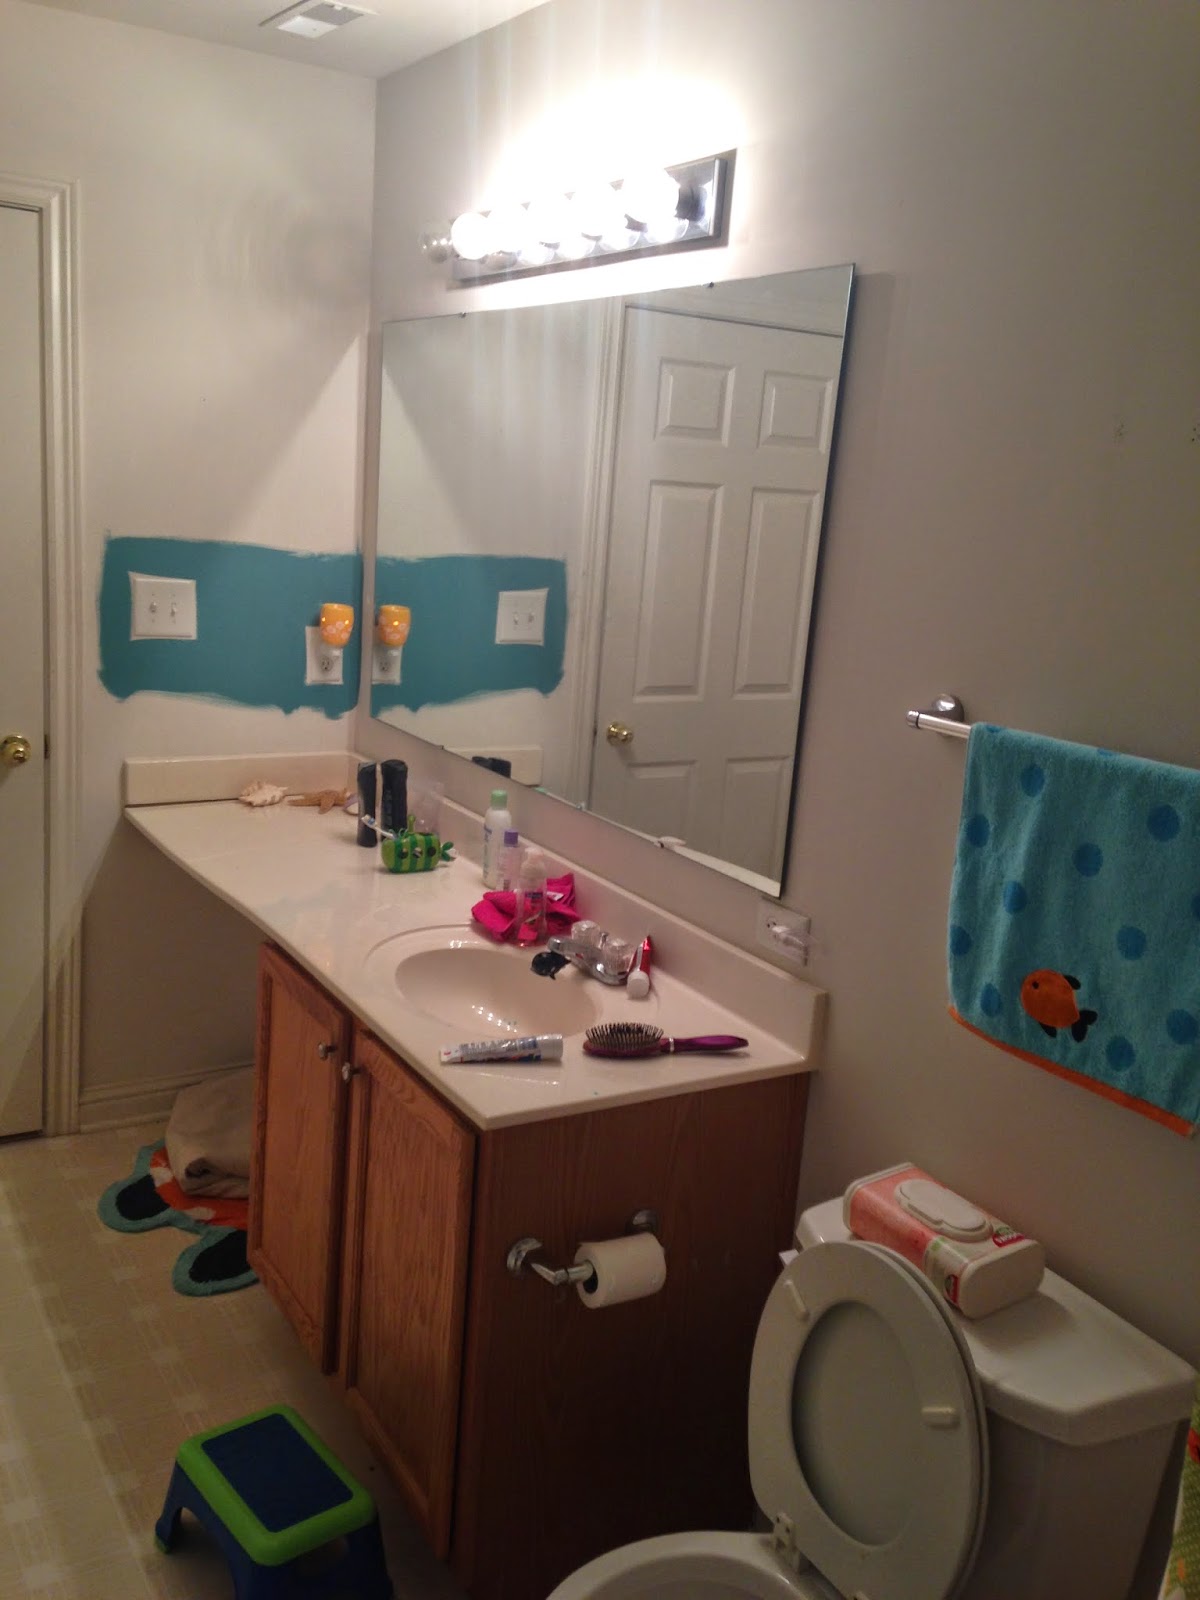
I tried out the playroom blue color near the light switches but ended up not liking it.

Two towel bars for four kids? I think not.

I found a really cute idea on Pinterest somewhere that inspired me to paint waves onto the walls. If I did it correctly, it would look like the kids were literally under the sea while taking their baths and showers. All of the sea creatures on the shower curtain would be below the sea as well.

I taped a straight line around the room to mark the sea line. Then I used a pencil to draw waves free-hand.

Then I taped the waves too. It's tough to make rounded lines with straight-edged tape, but I just kept applying tiny strips of tape at different angles to try and create the rounded edge I wanted.

The layers also helped to create the barrier I needed to make sure that paint didn't bleed across the line in either direction.

Then I painted the top part of the room a light, sky blue.

When the sky was dry, I peeled the tape off carefully. Not too shabby! This was still just an experiment that I was totally willing to paint right over if it failed, but I was pretty happy with how the waves turned out.

Then I realized that I was going to have to really let the top half of the room dry before I could re-tape the waves so that I could paint the water part of the waves. So I left for a day and came back the next.

The next day, I taped around the waves on the sky blue paint.
I taped around the shower and everything else that I didn't want to paint with ocean blue color.

Then I painted the waves and water on the long wall...

... and went all around the room with that color.

At some point, I realized that I hadn't patched the holes in the wall yet, so I had to paint around those.

Then I let the whole room dry.


Then I peeled the tape off of the waves! There were a few patches where paint had leaked through the tape, but I fixed that easily with a small paintbrush and a steady hand.

If you get up close to the waves, you can see the paint layers where the ocean blue was layered over the very edge of the sky blue. But this really doesn't bother me. I don't know that there was any way around it... ??

The blues aren't as bright as the ones in the shower curtain, but I'm also okay with that. I didn't want the room to look like a crayon box threw up inside it.

Down the road, if we decide to replace the child-like ocean creature theme and opt for a more mature beach theme, the paint job will still be relevant and not need to be changed. (I'm thinking ahead here, people!)

I think it's adorable.

The counter top will be replaced. We already have the replacement, just no time to install it yet. :)


A few weeks after painting, I found these cute towel hooks for super cheap. You can actually write a name on a piece of paper and slip it into the little space there.

They are pretty heavy hooks, and my husband said that he couldn't put them straight into the drywall, so we painted some wood planks and mounted them, then screwed in the hooks.

I put the fishy bath mats back on the floor.
.JPG)
.JPG)
We replaced the light fixture as well. We're going with brushed nickel fixtures.

We still need to paint the door and baseboards, but I want to replace the floor first. I'm keeping my eye out for a gray, stone-looking flooring that will be durable. They have some stunning distressed-wood looking ceramic tile that I drooled over at the hardware store and that wouldn't cost that much for such a tiny space, but I am trying to keep my options open and be practical.

Last but not least, I would like to install a stone backsplash (keeping with the beachy theme) but am not sure there is enough space between the counter top and the bottom of the mirror to justify doing this. I'd also like to frame the mirror... I wonder if I could take the stones from this backsplash and create a stone border around the mirror ?!?!? It might be kinda heavy. More consultation with the Husband is necessary for this one. What I dream, he makes happen, or negotiates something more reasonable!
More to come on the bathroom, but for now, the kids actually use it! And they have somewhere to put their towels! And they don't steal each other's towels anymore!
Success.