
This was the back of the house when we moved in.

This is a photo from some other project (trying to make milkglass...), which gives you an idea of the poor condition of the deck's paint job. There were also some rotted boards that we had to strategically cover with furniture so that no one's foot went through them!

Replacing an entire deck of this size would have been costly, so Will came up with an idea to save money by reusing as much of the wood as we could. He borrowed a planer (pictured below) from a co-worker so that we could feed salvage-able boards through it and take the dirty, painted layer right off the top. Underneath that layer is perfectly beautiful wood that we can put right back onto the deck!

We took a few days off of work ("vacation") to destroy and then re-build our deck, board by board. The structure was in-tact but very poorly stabilized in a few places (kind of concerning once we discovered that little nugget ...).

The original deck had been 8' x 8'. At some point, the original owners had extended the deck out further from the house and further to one side, making it roughly 16' x 16' and flush with the house on one side but not the other. This photo shows the non-flush side, with steps, where we've now put a garden and compost heap (post to come later).
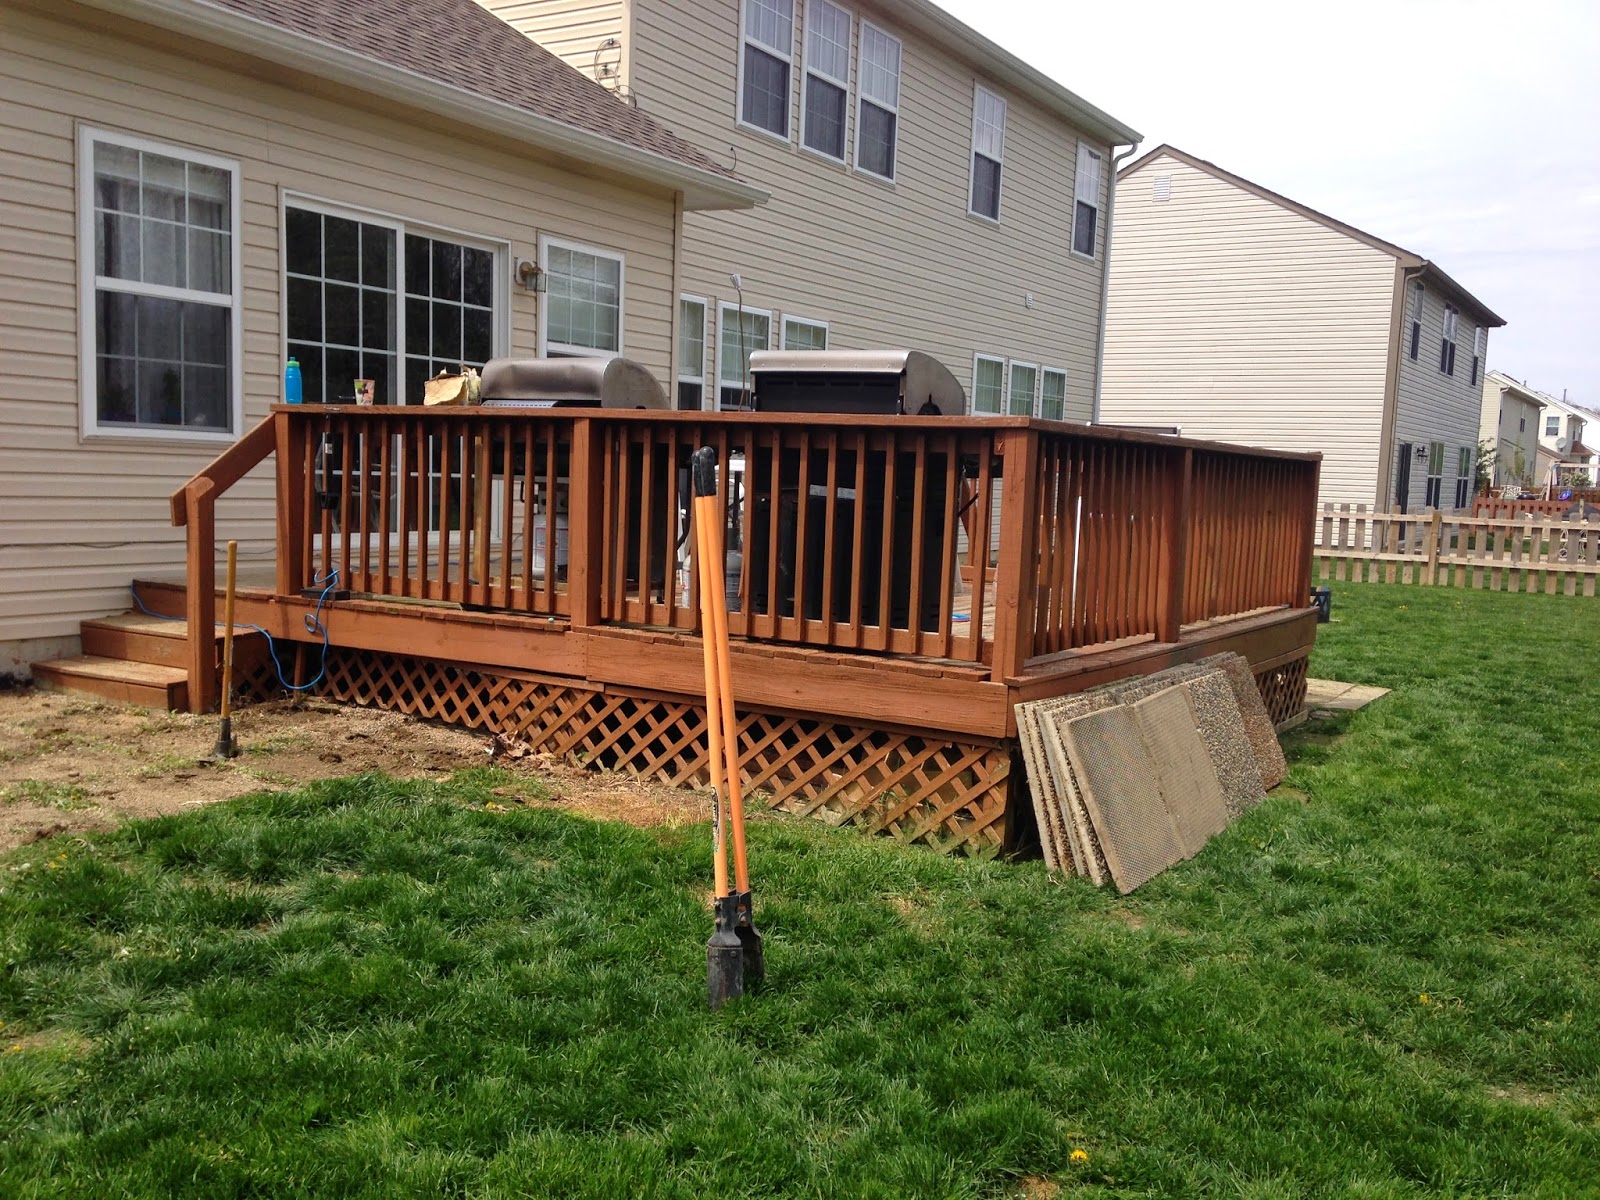
Then, we came along, and in putting the garden and compost heap together, we decided that it was silly to have the deck flush with the side of the house on one side but not with the other side. So, we decided to again extend the deck to the other side, making it roughly 20' x 16' now.


This is the flush side with steps and some cement pavers.

During the garden build, we took these steps off and blocked the space so our kids and dogs (mostly the dogs) didn't go jumping/falling off.

Then posts where set for the short garden fence and deck extension at the same time.

With the structure in place, we could now remove the railings and demo the floor boards! We started taking boards off in batches and running them through the planer. We took about 5 boards off by the back door, and then 5 boards off on the opposite side, ran them through the planer, and then started building the new deck from the back door outward.
In this photo, the wood on the left is old. The wood on the right is old+planed. And you can see how we also extended the deck about 4 feet to be flush with the side of the house. The wood is like-new and ready for staining (eventually...).

And so it went ... boards removed, planed, and re-attached.

Now, because of the extension, and because we estimated that roughly a third of the old boards were too rotted or worn or to be reusable, we knew we'd have to buy new boards for roughly half of the deck.

The first night, we got about 7 boards re-installed, and then we had to build a little walkway for the dogs. (Even with that tiny gap, my Great Dane didn't want to go across the walkway! Big baby.)

My herb pots will actually go exactly where they are in this photo, but I plan to hang them on the side of the deck railing so that they are part of the garden but easily accessible without stepping off the deck.

Just look at those old steps! They have to go.

And so we called it a night and made plans for the next day.

Somewhat sore, but mostly excited, we started early the next day and ripped out more old boards. Many, MANY of the screws were too stripped to pull out with power tools, so manual prying and smashing was required on a lot of them! SO FUN!

We planed and re-installed more boards until we got to the point where we knew we'd need to buy new boards. We did the math and determined that 45 new boards would cover the rest of the deck and new steps. Forgot to mention: We planned to keep the steps on both sides, but move them closer to the center on the garden side, and also install a new set of steps on the long side of the deck where there had just been railing before. So there will be 3 ways to enter and exit ... great for entertaining ... and extra-large dogs who think they can fit on all stairways with their humans, when really they just knock you to one side unless you let them charge up/down first ...

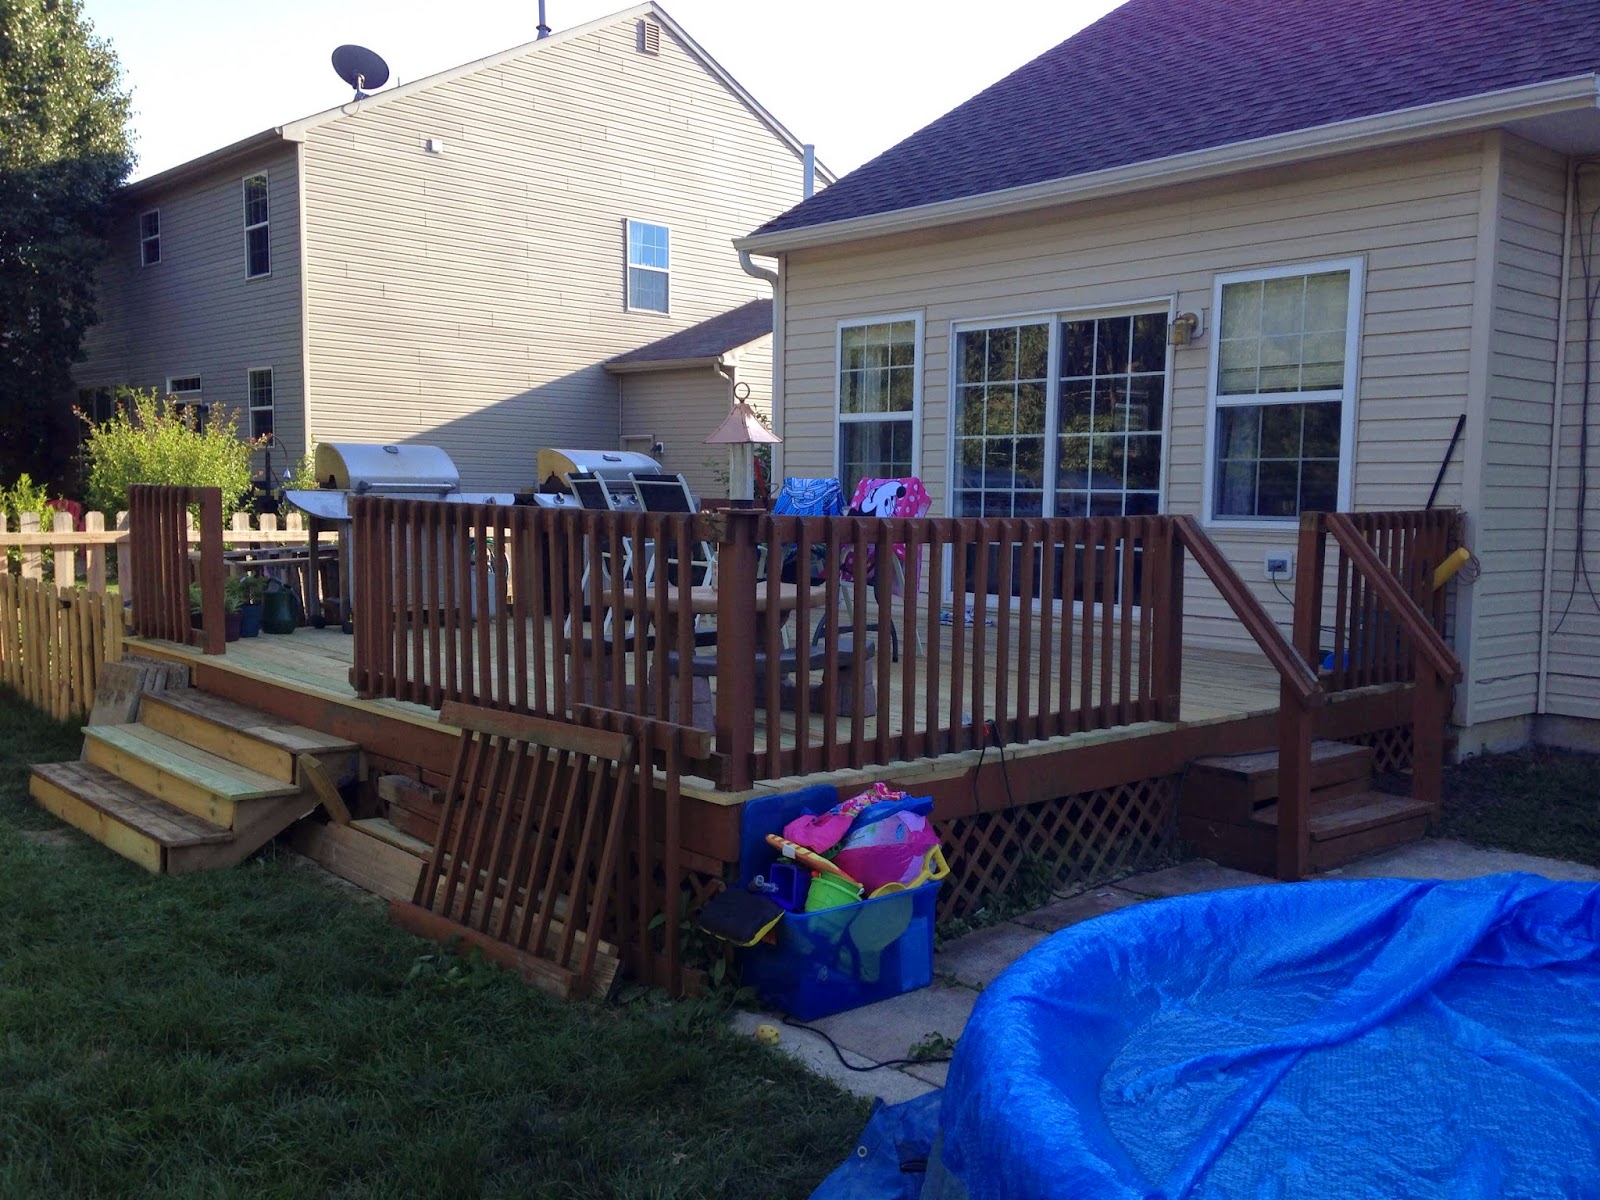
And so we called it a night again, after buying new wood and finishing up the re-furbished part of the deck (pictured above). There was still some demo to do on some remaining boards, which were all rotted or unusable, but we didn't have to use the planer anymore, so construction would go very quickly the next day.

These are heavier than they look ... thank goodness for gloves, and 2 people.

Coming together nicely!


With all of the remaining old boards removed, it was time to lay new boards as rapidly and square-ly as we could!

We aren't perfect by any means. One side got a little longer than the other, but what you do is make tiny adjustments with each additional board until you're back to being square on both sides again. Measure, measure, measure! Will stayed in the middle mostly, and I hopped from one side to the other.

Lay a board, cut the excess, screw it in. Line up another board that fits, cut any excess, screw it in. Take the part you cut off, hop to the other side, lay it down, cut any excess, screw it in. Waste as little as possible! Measure both sides to maintain squareness. Never put 2 seams together because that creates weak points. Always stagger the boards so that seams are scattered about the finished floor.

We used an entire huge bucket of screws ...

At the end, we had some tricky cutting to do. There were only a few inches left to cover, and multiple posts to accommodate.

Once the final boards were in, we chalk-lined the excess from end to end so that Will could run a saw down the line and make a nice, straight edge.

Cutting holes in the final boards to fit around the posts.

And when it was all said and done, tools cleaned up, and a couple of rails re-installed to keep dogs out of my garden ... TA-DA!

New/re-furbished deck floor with existing posts and structure, flush with both sides of the house, and ready for rails and steps.

The plan is to install the grills (one is handed-down from a neighbor that recently moved, and we don't think it works) and a sink into a counter-top where they are sitting in this photo. That's probably a year or more in the future since it's non-essential.

I love the natural look of wood. I can't wait to stain it a beautiful color (no brown paint!).

A great place for entertaining ... just in time for a party we're throwing in August!

So, where were the kids while we worked these 2.5 days? Why, in the pool of course! It was beautiful weather, and we were all together both working and playing.

Over the next few days of "vacation" we got the railings put back up. This one will be where I hang my herb pots over the side.

These steps should probably be replaced, but I think we might leave them alone. The deck won't stay this size forever. Our plan is to extend it even further across the back of the house once time and funds will allow! So these steps won't exist ... at least not where they are right now.

With the garden fenced off (with a gate) on the side, and with the deck being flush with the house, and with the new set of wide steps leading out the yard, I am loving how everything flows together!
I wouldn't say that we're DONE with this project, but we've certainly hit a good stopping point. Sanding, power-washing, and staining not only this new deck but also the fences we installed the past 2 years ... that's another huge job! We're hoping to get it done before this winter so that further weather damage to the wood can be prevented.

I love the new steps. They're not "done" either, but they're stable for now.

So that's it! We have a great outdoor structure that can only improve from here.

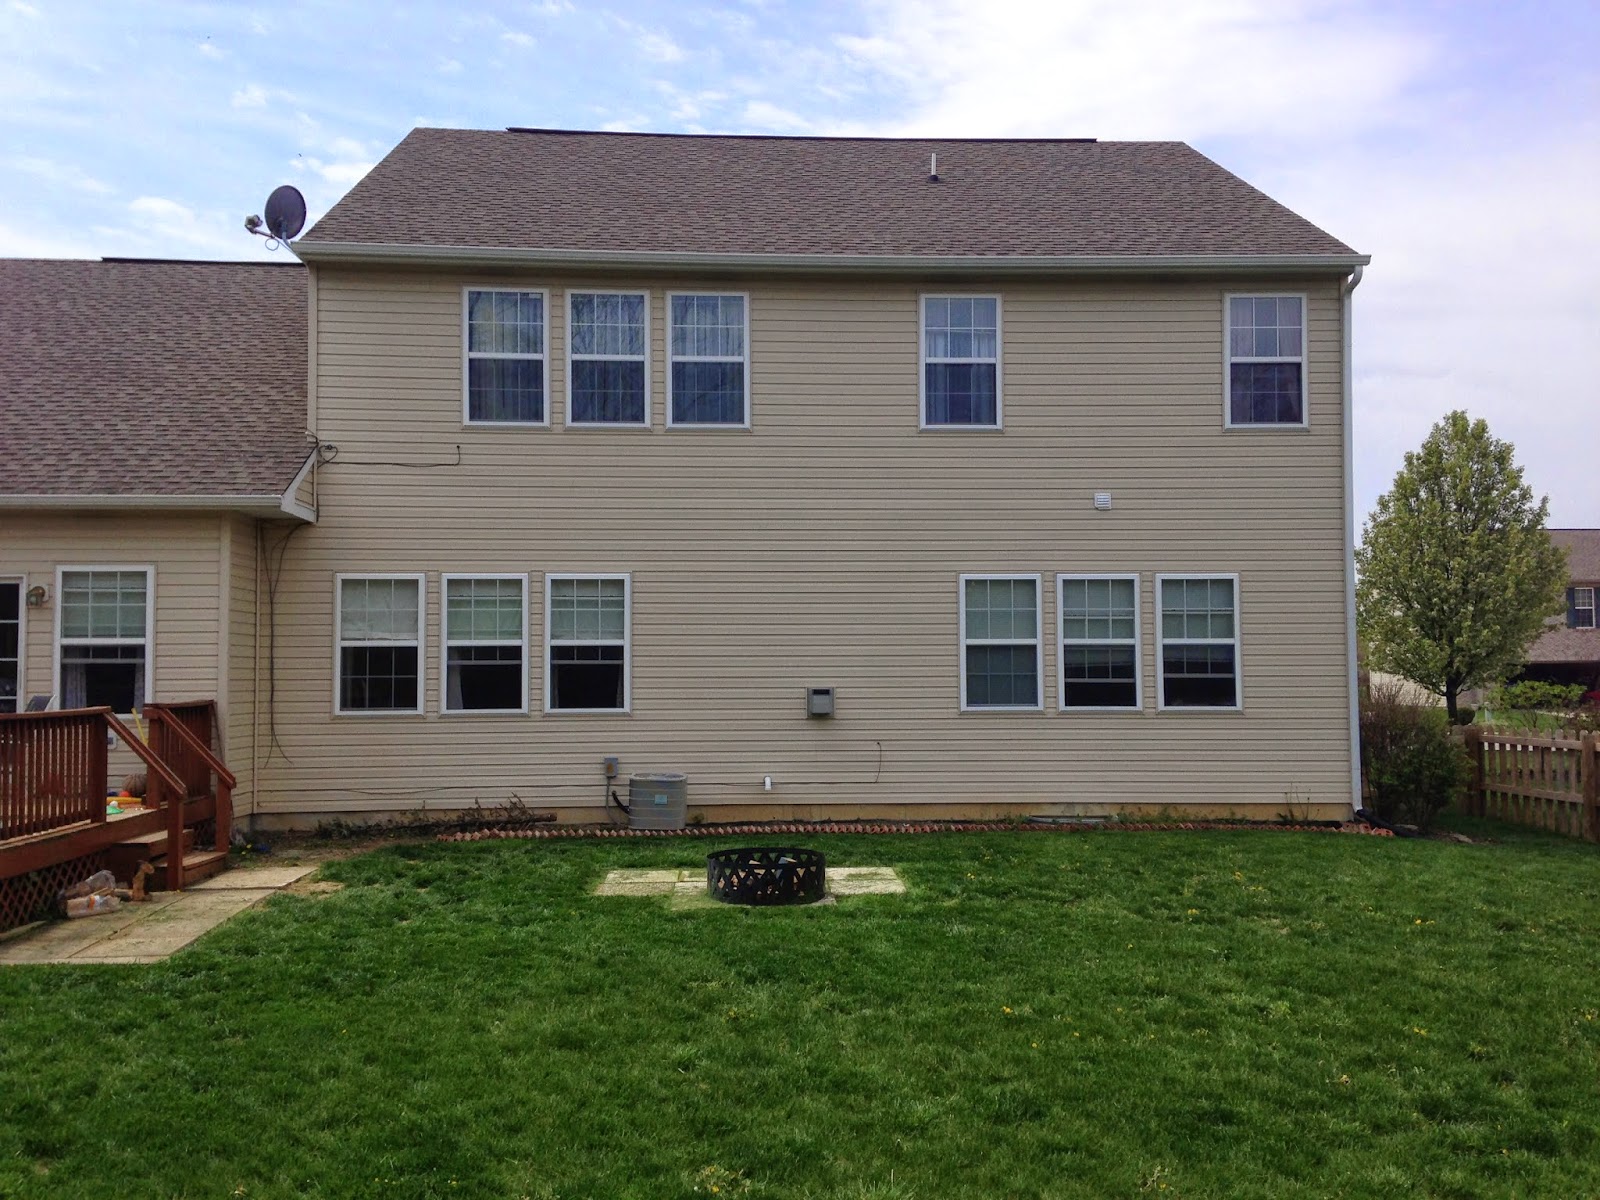
Eventually, we will extend the deck alllllll the way to the other side of the house. It will have a built-in fire pit like the janky one you see plopped between some cement pavers here.
I love doing projects with my husband. We work well together as a team and have complementary skills. I provide some of the vision and creativity to our plans, and he brings the skills and expertise to making those visions become real. He also has great ideas, so we both get what we want out of the finished product, and I am learning how to use power tools, so we both get our hands dirty! This Deck project was a really fun "vacation" for both of us. No, it wasn't the beach, but creating something together that we will be proud of with every future outdoor event that we host at our home is very satisfying nonetheless.
More posts about the garden, compost heap, our kids' bathroom, and the remaining pieces of our master closet are still to come!